kickstartによるインストールのサンプルファイルをいくつかピックアップしてみたいと思います。
サンプルとしては以下3つ。
これ以外にも応用はいくらでもできると思います。
1.CentOS7上のKVMにminimalでインストール
1-1.kickstartファイルの作成
vi c76min.ks

cmdline
install
# Keyboard layouts
keyboard --vckeymap=us --xlayouts='us'
# System language
lang en_US.UTF-8

# Network information
network  --bootproto=dhcp --device=eth0 --onboot=on --noipv6 --activate
#network  --bootproto=static --device=eth0 --ip=192.168.0.100 --netmask=255.255.255.0 --gateway=192.168.0.1 --nameserver=192.168.0.1 --noipv6 --activate
network  --bootproto=static --device=eth1 --ip=192.168.1.100 --netmask=255.255.255.0 --noipv6
network  --hostname=c7623.local.com

zerombr
bootloader --location=mbr --boot-drive=vda --append="crashkernel=auto biosdevname=0 net.ifnames=0 console=tty0 console=ttyS0,115200n8"
clearpart --none --initlabel

# Disk partitioning information
part /boot --ondisk=vda --size=1024 --fstype="xfs"
part pv.1  --ondisk=vda --size=1024 --grow
volgroup centos --pesize=4096 pv.1
logvol swap  --fstype="swap" --name=swap --vgname=centos --recommended
logvol /     --fstype="xfs"  --name=root --vgname=centos --size=1024 --grow

# Root password
rootpw --plaintext TESTPASSWORD
# System timezone
timezone Asia/Tokyo --isUtc --nontp
user --groups=wheel --name=user1 --password=TESTPASSWORD --plaintext
# X Window System configuration information
xconfig  --startxonboot

%packages
@^minimal
@core
kexec-tools
chrony

%end
reboot --eject
1-3.virt-installの実行
virt-install --connect=qemu:///system \
 --name=c7623 \
 --disk /var/lib/libvirt/images/c7623.qcow2,format=qcow2,bus=virtio \
 --network bridge=virbr0,model=virtio \
 --network network=ovsnw,portgroup=vlan301,model=virtio \
 --initrd-inject=./c76min.ks \
 --extra-args='ks=file:/c76min.ks biosdevname=0 net.ifnames=0 console=tty0 console=ttyS0,115200n8' \
 --vcpus=1 \
 --ram=1024 \
 --accelerate \
 --hvm \
 --location='/var/lib/libvirt/images/CentOS-7-x86_64-DVD-1810.iso' \
 --nographics \
 --os-type=linux \
 --os-variant=centos7.0 \
 --arch=x86_64
1-4.補足
上記1-3のvirt-installコマンドのうち、
--network network=ovsnw,portgroup=vlan301,model=virtio \
の部分は
以下のようにovsにてスイッチを作成し、net-defineによって定義した場合の設定となります。
vi /tmp/ovsnw.xml

<network>
<name>ovsnw
<forward mode='bridge'/>
<bridge name='ovsbr0'/>
<virtualport type='openvswitch'/>
<portgroup name='untag' default='yes'>
</portgroup>
<portgroup name='vlan11'>
  <vlan>
    <tag id='11'/>
  </vlan>
</portgroup>
<portgroup name='vlan300'>
  <vlan>
    <tag id='300'/>
  </vlan>
</portgroup>
<portgroup name='vlan301'>
  <vlan>
    <tag id='301'/>
  </vlan>
</portgroup>
<portgroup name='vlan302'>
  <vlan>
    <tag id='302'/>
  </vlan>
</portgroup>
</network>

virsh net-define /tmp/ovsnw.xml
virsh net-start ovsnw
virsh net-autostart ovsnw
virsh net-list
2.CentOS7上のKVMにServerGUIでインストール
2-1.kickstartファイルの作成
vi c76gui.ks

cmdline
install
# Keyboard layouts
keyboard --vckeymap=us --xlayouts='us'
# System language
lang en_US.UTF-8

# Network information
network  --bootproto=dhcp --device=eth0 --onboot=on --noipv6 --activate
#network  --bootproto=static --device=eth0 --ip=192.168.0.100 --netmask=255.255.255.0 --gateway=192.168.0.1 --nameserver=192.168.0.1 --noipv6 --activate
network  --bootproto=static --device=eth1 --ip=192.168.1.100 --netmask=255.255.255.0 --noipv6
network  --hostname=c7625.local.com

zerombr
bootloader --location=mbr --boot-drive=vda --append="crashkernel=auto biosdevname=0 net.ifnames=0 console=tty0 console=ttyS0,115200n8"
clearpart --none --initlabel

# Disk partitioning information
part /boot --ondisk=vda --size=1024 --fstype="xfs"
part pv.1  --ondisk=vda --size=1024 --grow
volgroup centos --pesize=4096 pv.1
logvol swap  --fstype="swap" --name=swap --vgname=centos --recommended
logvol /     --fstype="xfs"  --name=root --vgname=centos --size=1024 --grow

# Root password
rootpw --plaintext TESTPASSWORD
# System timezone
timezone Asia/Tokyo --isUtc --nontp
user --groups=wheel --name=user1 --password=TESTPASSWORD --plaintext
# X Window System configuration information
xconfig  --startxonboot

%packages
@^graphical-server-environment
@base
@core
@desktop-debugging
@development
@fonts
@gnome-desktop
@guest-agents
@guest-desktop-agents
@hardware-monitoring
@input-methods
@internet-browser
@virtualization-client
@virtualization-hypervisor
@virtualization-tools
@x11

%end
reboot --eject
2-3.virt-installの実行
virt-install --connect=qemu:///system \
 --name=c7625 \
 --disk /var/lib/libvirt/images/c7625.qcow2,format=qcow2,bus=virtio \
 --network bridge=virbr0,model=virtio \
 --network network=ovsnw,portgroup=vlan301,model=virtio \
 --initrd-inject=./c76gui.ks \
 --extra-args='ks=file:/c76gui.ks biosdevname=0 net.ifnames=0 console=tty0 console=ttyS0,115200n8' \
 --vcpus=1 \
 --ram=1024 \
 --accelerate \
 --hvm \
 --location='/var/lib/libvirt/images/CentOS-7-x86_64-DVD-1810.iso' \
 --nographics \
 --os-type=linux \
 --os-variant=centos7.0 \
 --arch=x86_64
3.DL360G8上にCentOS7をServerGUIでインストール
3-1.kickstartファイルの作成
#version=DEVEL
# X Window System configuration information
xconfig  --startxonboot
# License agreement
eula --agreed
# Use CDROM installation media
cdrom
# Use graphical install
graphical
# Run the Setup Agent on first boot
firstboot --enable
# Keyboard layouts
keyboard --vckeymap=us --xlayouts='us'
# System language
lang en_US.UTF-8

ignoredisk --only-use=sda
# Network information
network  --bootproto=static --device=eno1 --ip=192.168.0.100 --netmask=255.255.255.0 --gateway=192.168.0.1 --nameserver=192.168.0.1 --noipv6 --activate
network  --hostname=c765.local.com
#network  --bootproto=dhcp --device=eno2 --onboot=off --ipv6=auto
#network  --bootproto=dhcp --device=eno3 --onboot=off --ipv6=auto
#network  --bootproto=dhcp --device=eno4 --onboot=off --ipv6=auto
#network  --bootproto=dhcp --device=ens1f0 --onboot=off --ipv6=auto
#network  --bootproto=dhcp --device=ens1f1 --onboot=off --ipv6=auto

# Reboot after installation
reboot --eject
# Root password
rootpw --plaintext TESTPASSWORD
# System timezone
timezone Asia/Tokyo --isUtc --nontp
user --groups=wheel --name=user1 --password=TESTPASSWORD
# System bootloader configuration
bootloader --append=" crashkernel=auto" --location=mbr --boot-drive=sda
# Partition clearing information
clearpart --all --initlabel --drives=sda
# Disk partitioning information
part pv.105 --fstype="lvmpv" --ondisk=sda --size=1    --grow
part /boot  --fstype="xfs"   --ondisk=sda --size=1024
volgroup centos --pesize=4096 pv.105
logvol /     --fstype="xfs"  --name=root --vgname=centos --size=1    --grow
logvol swap  --fstype="swap" --name=swap --vgname=centos --size=4096

%packages
@^graphical-server-environment
@base
@core
@desktop-debugging
@development
@dial-up
@fonts
@gnome-desktop
@guest-agents
@guest-desktop-agents
@hardware-monitoring
@input-methods
@internet-browser
@multimedia
@print-client
@virtualization-client
@virtualization-hypervisor
@virtualization-tools
@x11
kexec-tools
%end

%addon com_redhat_kdump --enable --reserve-mb=auto
%end

%anaconda
pwpolicy root --minlen=6 --minquality=1 --notstrict --nochanges --notempty
pwpolicy user --minlen=6 --minquality=1 --notstrict --nochanges --emptyok
pwpolicy luks --minlen=6 --minquality=1 --notstrict --nochanges --notempty
%end
ファイル名をks.cfgとして、isoやimgファイルなどにイメージ化してください。
ここではイメージ化後のファイル名をks.imgとします。
3-2.イメージファイルのセット

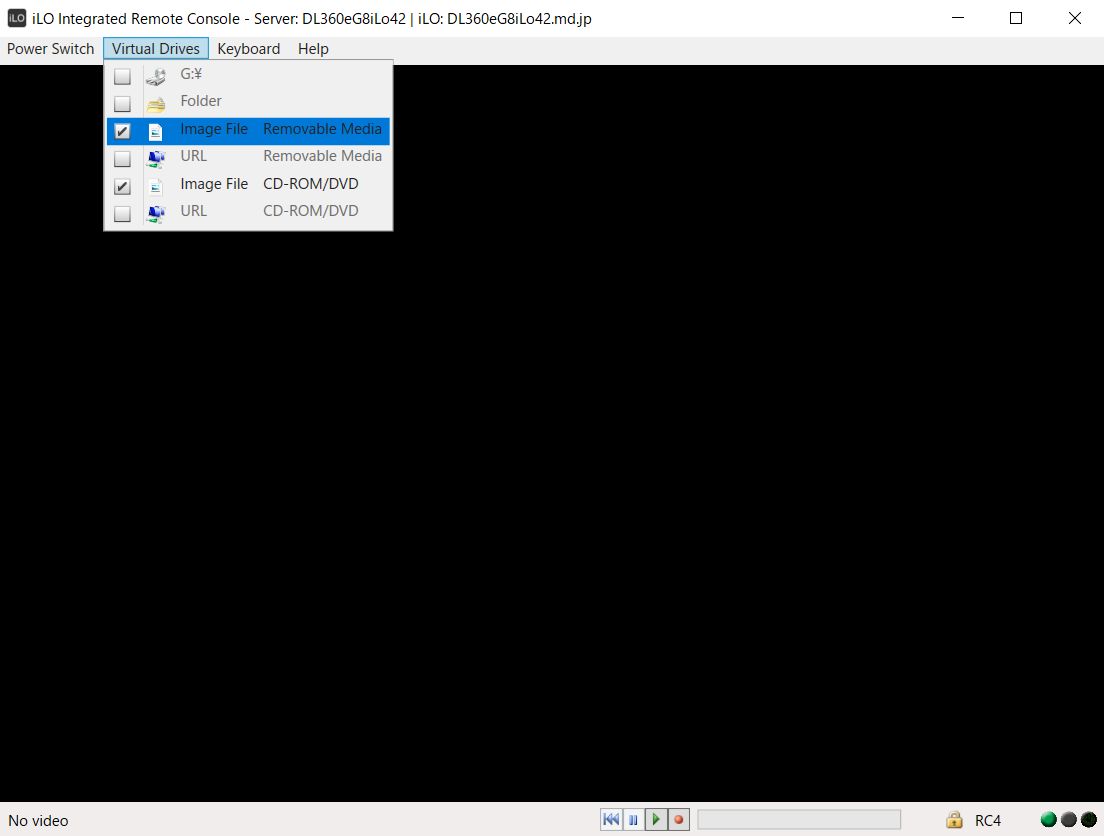
上図のうち、以下のようにイメージファイルをセットします。
| ImageFile RemovalMedhia | ks.img |
| ImageFile CD-ROM/DVD | CentOS-7-x86_64-DVD-1810.iso |
3-3.起動オプションの設定とインストールの実行

筐体を起動後、上図が表示されたら
Install CentOS 7を選択し、Tabキーを入力してください。
次に起動オプションの入力を促されるので、以下の通り入力してください。
inst.ks=hd:sdb:/ks.cfg
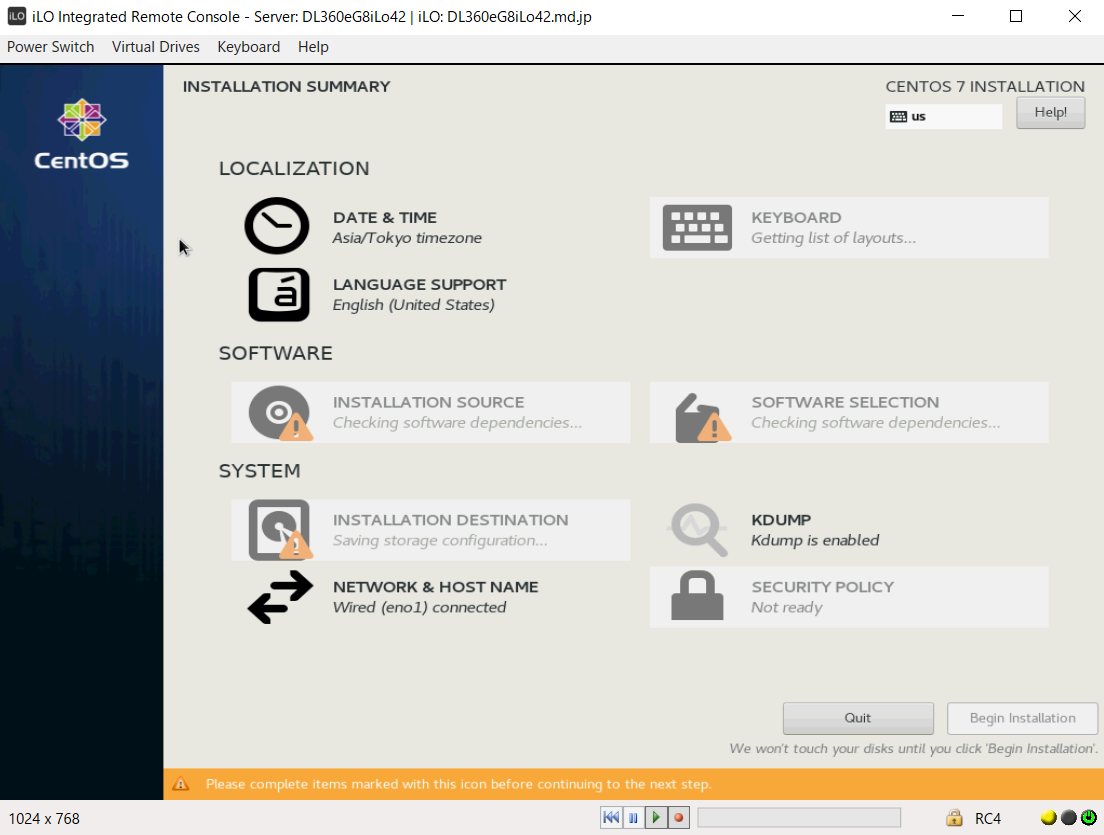
以下のようにインストールが始まれば、あとは待つだけです。

以上です。
10.最後に
以下のサイトを参考にさせて頂きました。
KickStartその2(ks.cfg設定ファイルの説明) - のぴぴのメモ
/root/anaconda-ks.cfgを参考にすれば色々試せると思いますので、自分なりにやってみることをおススメします。
*1:graphicalではなく、textの方がインストールは早いのですが、私の環境ではなぜか?インストール中に何度も失敗したためgraphicalにしています。